# Github webhook
This guide describes how to integrate your Zabbix installation with Github issues using the Zabbix webhook feature. This guide will provide instructions on setting up a media type, a user and an action in Zabbix.
## In Github
1\. Create or use existing user in Github with permission to create issues and
issue comments in desired repositories.
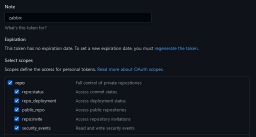
2\. Please create a **personal access token** according to the original [instruction](https://docs.github.com/en/github/authenticating-to-github/keeping-your-account-and-data-secure/creating-a-personal-access-token).
Example of permissions for private repository.
[](images/2.jpg)
3\. Copy the **personal access token** of your new integration to use it in Zabbix.
## In Zabbix
The configuration consists of a _media type_ in Zabbix, which will invoke the webhook to send alerts to Github issues through the Github Rest API.
1\. [Import](https://www.zabbix.com/documentation/7.0/manual/web_interface/frontend_sections/alerts/mediatypes) the Github media type from file [media_github.yaml](media_github.yaml).
2\. Change in the imported media the values of the variable github_token.
Change github_url only for integrations with Github Enterprise.
For more information about the Zabbix Webhook configuration, please see the [documentation](https://www.zabbix.com/documentation/7.0/manual/config/notifications/media/webhook).
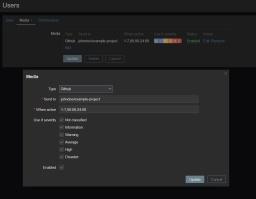
3\. Create user and add Github media type to it. In field "Send to" use your full repo name (\/\) e.g. johndoe/example-project.
[](images/1.jpg)
4\. Set up a global macro {$ZABBIX.URL} with URL of current zabbix. Please notice that HTTPS will be used by default if HTTP/HTTPS schema is not present in the URL.
For more information, please see [Zabbix](https://www.zabbix.com/documentation/7.0/manual/config/notifications) and [Github](https://docs.github.com/en/rest) documentation.
## Supported Versions
Zabbix 7.0, Github RestApi v3