|
|
1 year ago | |
|---|---|---|
| .. | ||
| images | 1 year ago | |
| README.md | 1 year ago | |
| ZabbixTicketConnector.yml | 1 year ago | |
| media_otrs_ce.yaml | 1 year ago | |
README.md
((OTRS)) Community Edition webhook
This guide describes how to integrate your Zabbix 7.0 installation with ((OTRS)) Community Edition, hereinafter - "((OTRS)) CE", using the Zabbix webhook feature. This guide will provide instructions on setting up a media type, a user and an action in Zabbix.
Requirements
- ((OTRS)) CE version 6
- Zabbix version 7.0 or higher
Setting up a ((OTRS)) CE
1. Import ZabbixTicketConnector.yml in Admin > Web Services.
2. Create a new user for a Zabbix alerter with an email address.
Zabbix Webhook configuration
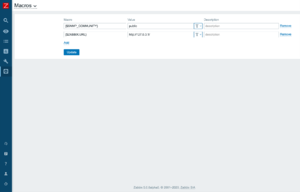
Create a global macro
1. Before setting up the Webhook, you need to setup the global macro {$ZABBIX.URL}, which must contain the URL to the Zabbix frontend.
2. In the Administration > Media types section, import the media_otrs_ce.yaml
3. Open the added ((OTRS)) CE media type and set:
- otrs_auth_user to the your Agent username
- otrs_auth_password to the your Agent password
- otrs_customer to your ((OTRS)) CE customer email
- otrs_queue to your ((OTRS)) CE ticket queue
- otrs_url to the frontend URL of your ((OTRS)) CE installation
4. If you want to prioritize issues according to severity values in Zabbix, you can define mapping parameters:
- severity_<name>: ((OTRS)) CE priority ID
5. If you have dynamic fields in ((OTRS)) CE and you want them to be filled with values from Zabbix, add parameters in the form dynamicfield_<((OTRS)) CE dynamic field name>. Dynamic fields can only be of the text, textarea, checkbox, or date types.
6. Click the Update button to save the Webhook settings.
7. To receive notifications in ((OTRS)) CE, you need to create a Zabbix user and add Media with the ((OTRS)) CE type.
For Send to: enter any text, as this value is not used, but is required.
For more information, use the Zabbix and ((OTRS)) CE documentations.
Supported Versions
Zabbix 7.0


