You can not select more than 25 topics
Topics must start with a letter or number, can include dashes ('-') and can be up to 35 characters long.
|
|
1 year ago | |
|---|---|---|
| .idea | 1 year ago | |
| backend | 1 year ago | |
| doc | 1 year ago | |
| frontend | 1 year ago | |
| .gitignore | 1 year ago | |
| Dockerfile | 1 year ago | |
| LICENSE | 1 year ago | |
| README.md | 1 year ago | |
| build.sh | 1 year ago | |
| entrypoint.sh | 1 year ago | |
| start.sh | 1 year ago | |
README.md
spring-boot-online-exam
在线Demo预览,http://129.211.88.191 ,账户分别是admin、teacher、student,密码是admin123。视频讲解代码:https://www.bilibili.com/video/BV1FP4y1L7xt/
好消息!!!一个小伙伴做了Python实现,欢迎大家star:https://github.com/xingxingzaixian/django-drf-online-exam
1.快速体验
1.1 事先准备
clone代码并进入代码路径
git clone git@github.com:lsgwr/spring-boot-online-exam.git
cd spring-boot-online-exam
下面按照Linux和windows说明快速搭建的方法
1.2 Linux
执行代码下的脚本start.sh即可
然后访问 http://ip:80 即可访问自己搭建的考试系统
1.3 windows
- 1.安装JDK,推荐JDK8
- 2.从官方仓库下载发布的jar包,建议选择最新版:https://github.com/lsgwr/spring-boot-online-exam/releases
- 3.安装MySQL,创建数据库exam,并初始化密码为aA111111,导入doc/sql/exam.sql文件来创建数据库
- 4.启动jar包:
java -jar exam.jar - 5.访问:http://ip:9527 即可访问自己搭建的考试系统
2.介绍
基于springboot的在线考试系统
2.1 功能简介
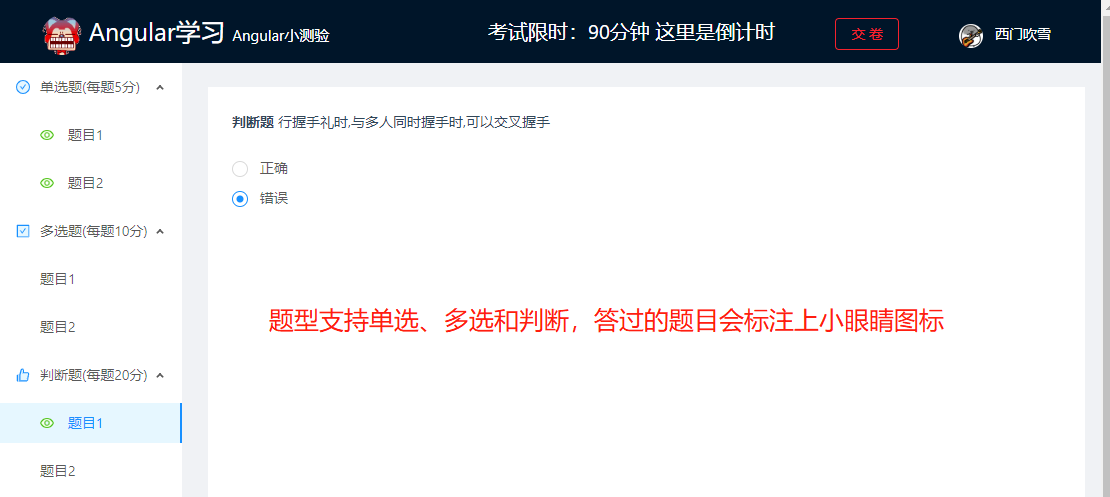
- 支持单选题、多选题、判断题
- 支持学生(student)、教师(teacher)、管理员(admin)三种角色
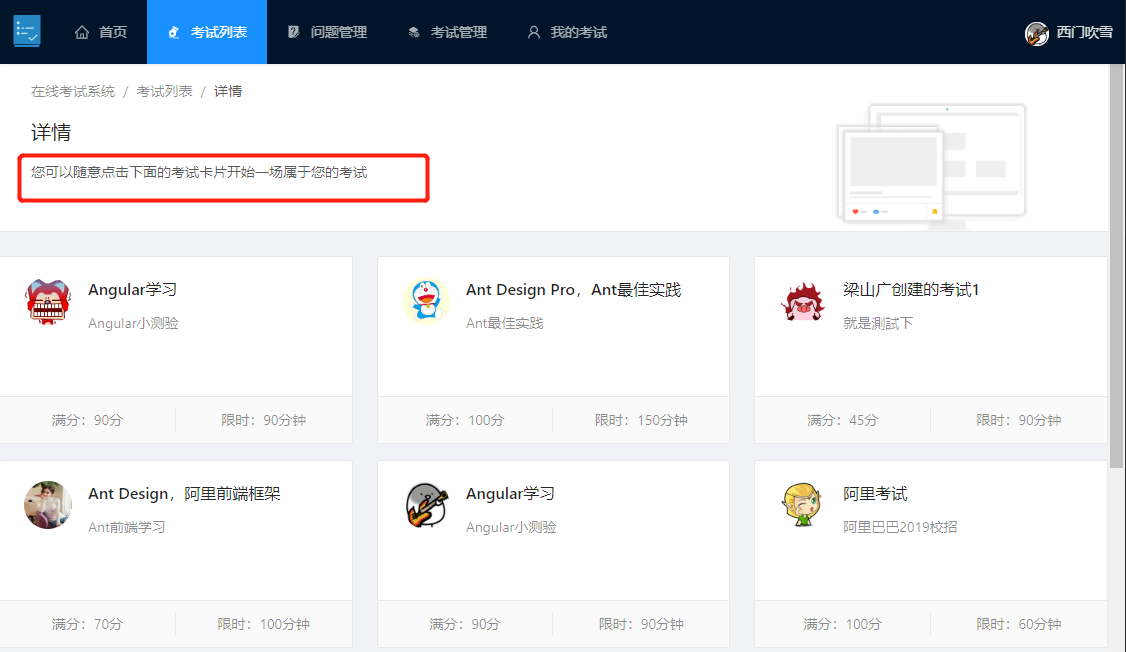
- 学生:参加考试和查看我的考试
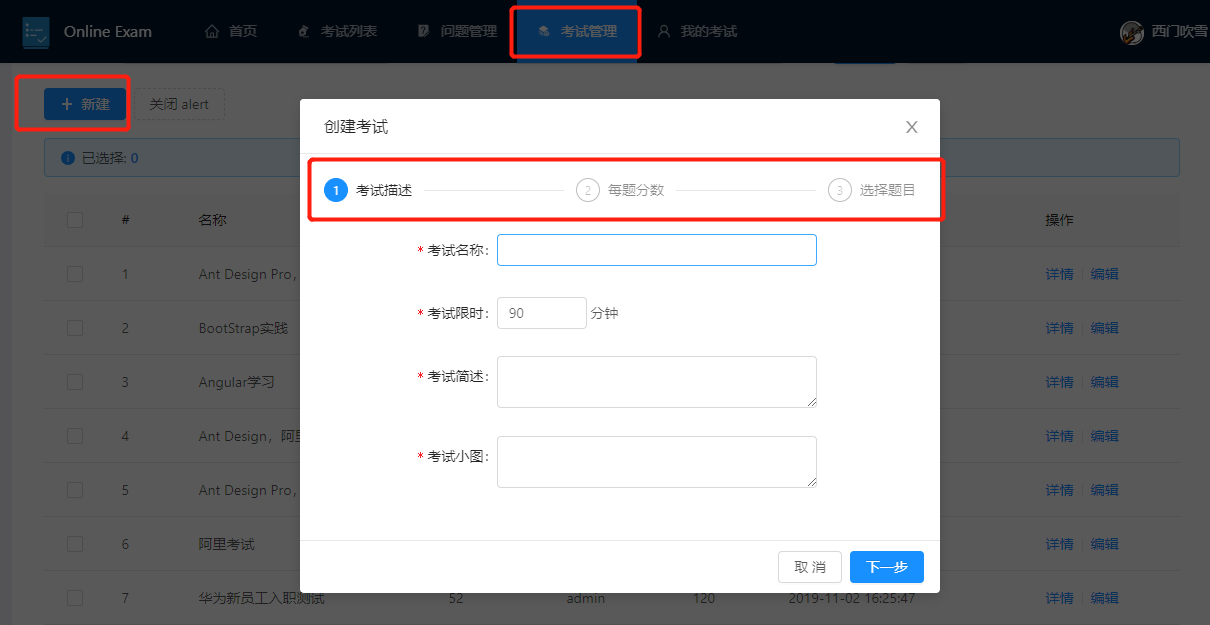
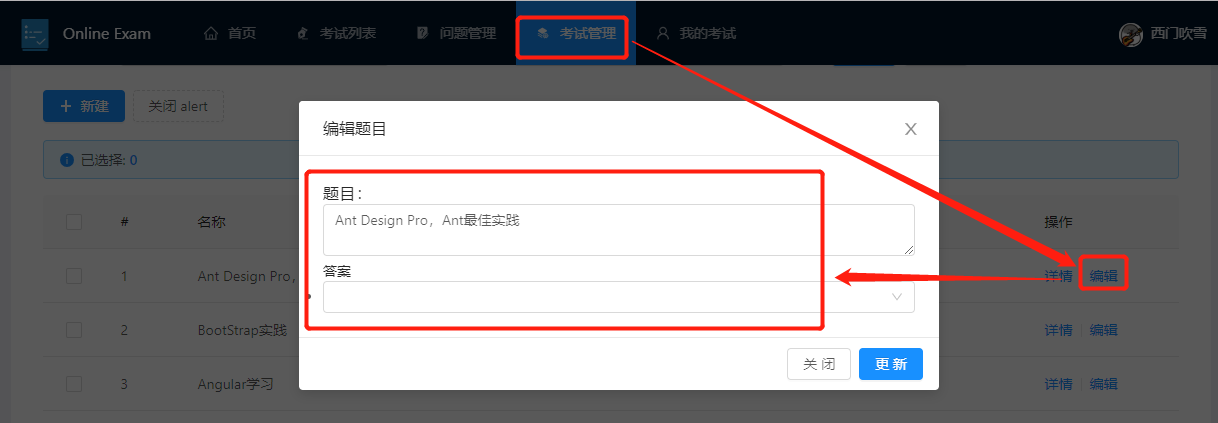
- 教师:学生的所有权限+创建/编辑题目+创建/编辑考试
- 管理员:教师的所有权限+管理用户
2.3 软件架构
前后端分离,前段组件化,方便二次开发;后端
- 后端采用SpringBoot+JPA++Swagger2+JWT校验,根据不同用户的权限返回给用户不同的数据
- 后端采用Vue+AntDesign,组件化拆分,封装了很多年公共组件,方便维护和二次开发
2.3 使用教程
- 1.下载代码
git clone https://github.com/19920625lsg/spring-boot-online-exam.git - 2.初始化数据库
安装mysql的步骤这里省略,网上的教程很多。安装好mysql后,新建exam数据库,密码和
spring-boot-online-exam/backend/exam/src/main/resources/application.yml的password: xxxxxx保持一致,然后导入spring-boot-online-exam/doc/sql/exam.sql - 3.启动后端
打开
spring-boot-online-exam/backend/exam这个Maven项目,可以在IDE里启动或者执行mvn install生成jar包启动 - 4.启动前端
- 进入到前端代码路径
cd spring-boot-online-exam/frontend/exam/ - 安装依赖
npm install - 启动前端
npm run serve
- 进入到前端代码路径
- 5.部署完毕,查看效果
打开 http://localhost:8000 或者 http://本机ip:8000 即可查看演示效果
3.功能图示
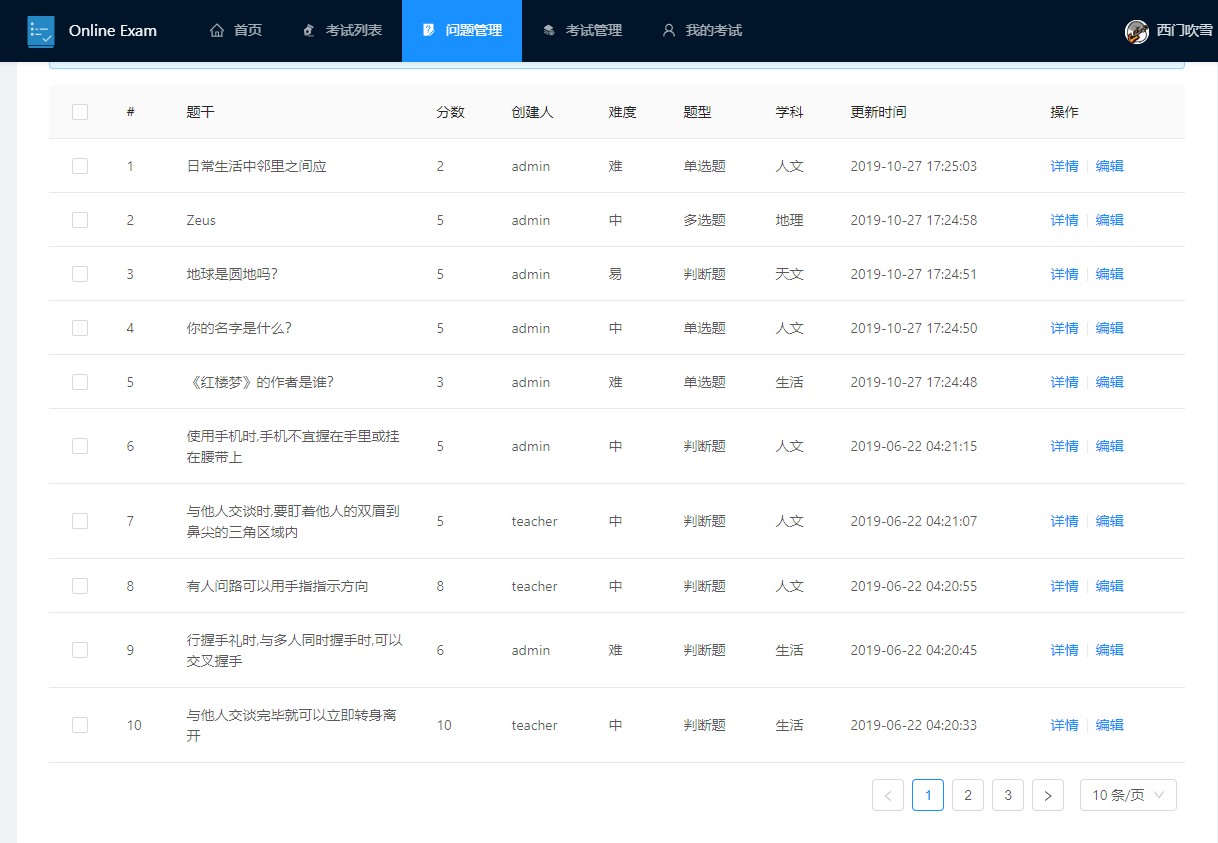
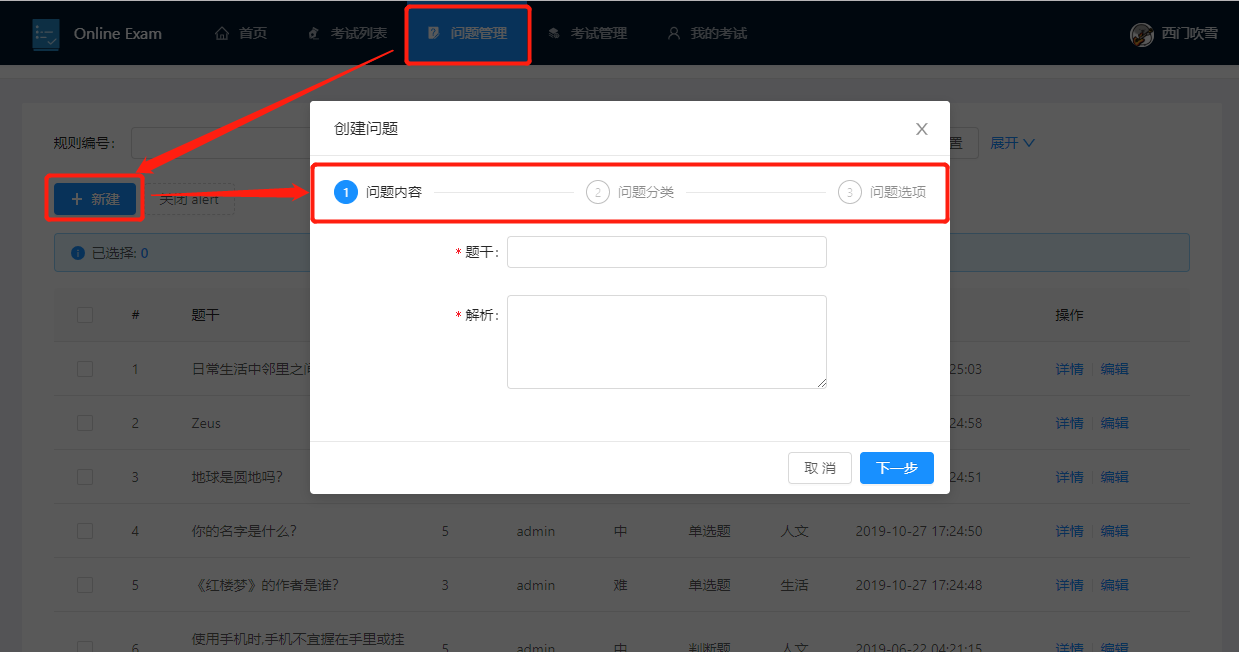
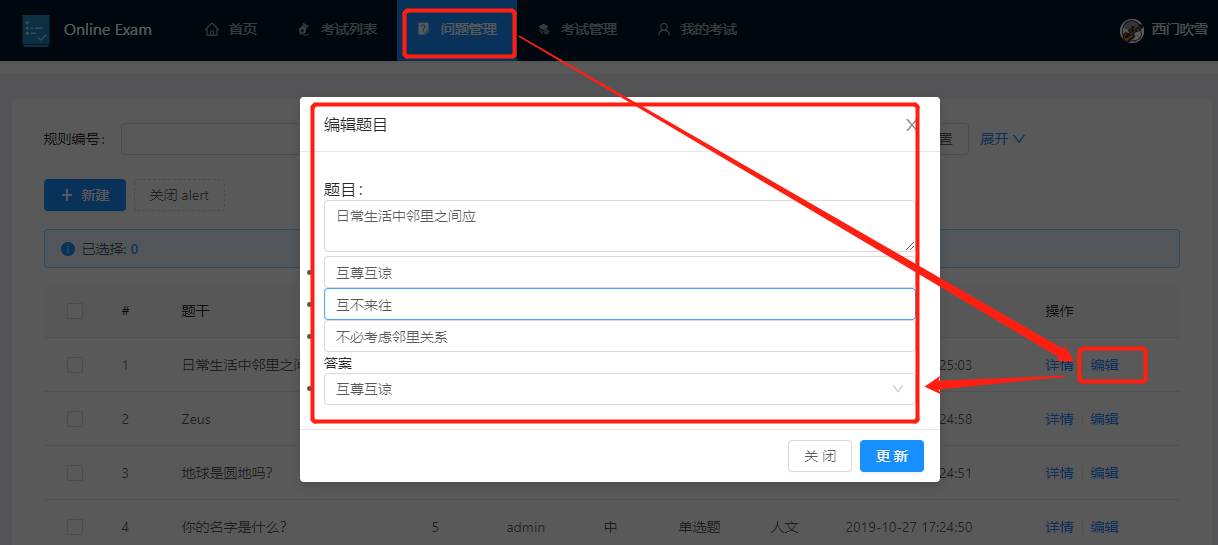
- 1.管理题目
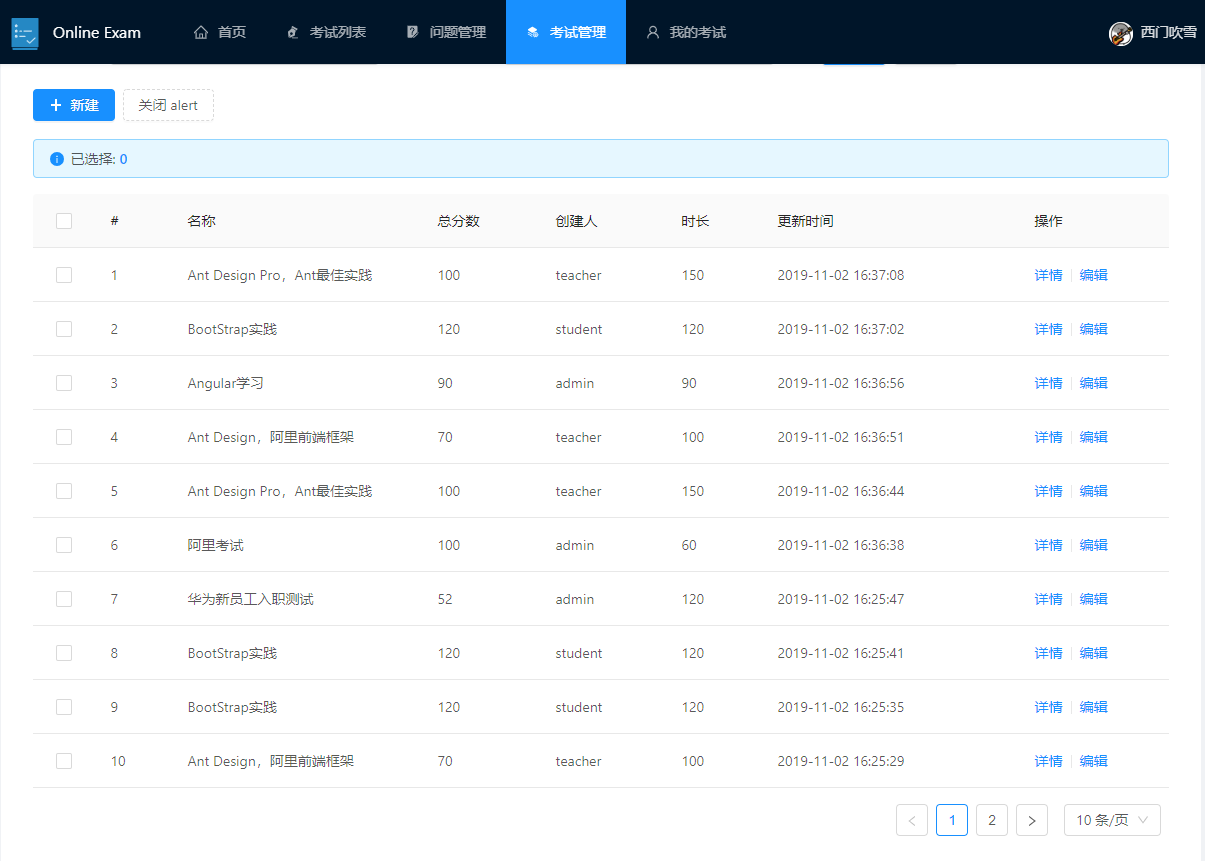
- 2.考试管理
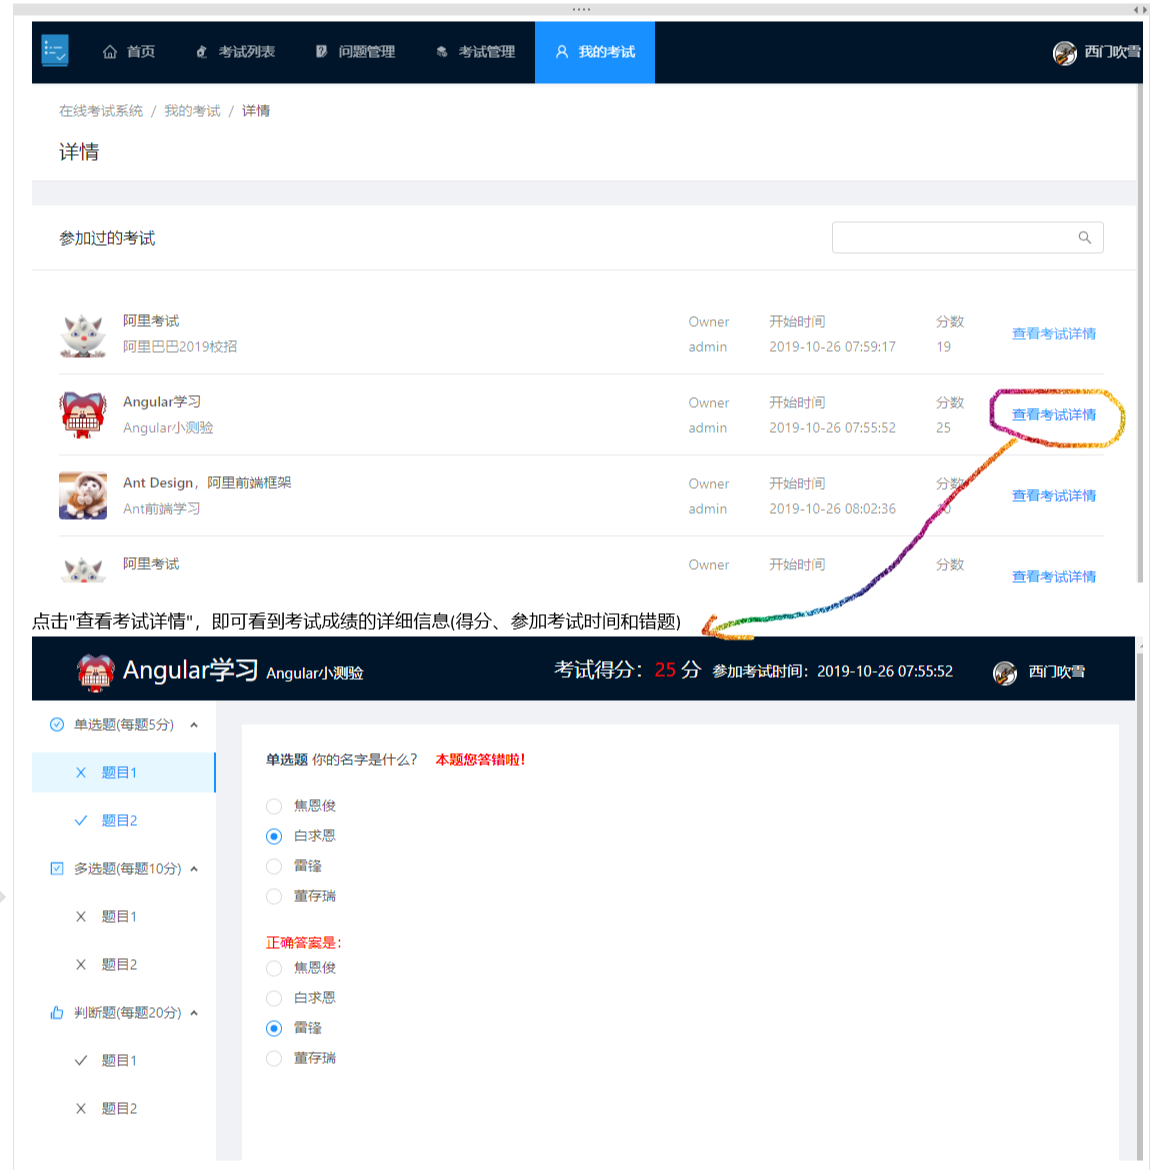
- 3.我的考试
4.参与贡献
- Fork 本仓库
- 新建 exam_xxx 分支
- 提交代码
- 新建 Pull Request
5.Todo
√0.修复issue提地bug:题目创建失败√1.考试详情编辑- 2.支持题目和考试的删除
删除的话比较麻烦,先不做了,最好是弄个visible字段,不实际删除,要不后面有些关联数据找不到就不好了如果题目有关联的考试则必须先删除对应的考试,反过来删除考试则不用删除题目
- 3.图片改成base64存到数据库中
- 4.题干和选项支持富文本
- 5.支持批量导入题目
- 6.新增用户管理、学科管理功能
- 7.老师能考到所有学生的成绩以及考试的统计信息
- 8.更多的数据分析功能
- 9.支持容器化一键式部署(编好Dockerfile)
- 10.支持移动端,最好用uniapp做
- ......抓紧做吧,争取每周末做一点......
