|
|
基于Hyperledger Fabric的学位学历认证管理系统
|
|
|
项目功能介绍:https://blog.csdn.net/qq_45808700/article/details/129423030
|
|
|
### 1.部署环境
|
|
|
|
|
|
•阿里云主机 Ubuntu 16.04 64 位(root 用户)
|
|
|
|
|
|
•Golang 语言 go1.17
|
|
|
|
|
|
•docker 18.09.7
|
|
|
|
|
|
•docker-compose 1.22.0
|
|
|
|
|
|
|
|
|
### 2.环境配置
|
|
|
|
|
|
#### 2.1安装 docker 以及 docker-compose
|
|
|
|
|
|
使用 docker 可以方便的解决程序依赖的环境问题;并且后续需要使用到的 Hyperledger Fabric 框架官方也提供了相应的 docker 的容器。
|
|
|
安装 docker 命令:
|
|
|
|
|
|
```bash
|
|
|
sudo apt install docker.io
|
|
|
```
|
|
|
|
|
|
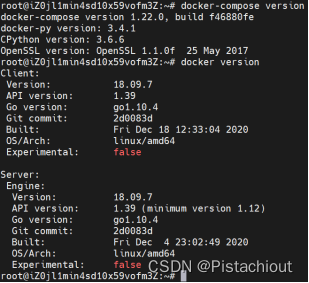
验证 docker 成功安装:docker version,结果如图所示:
|
|
|
|
|
|
|
|
|
|
|
|
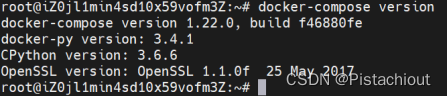
为了方便管理多个 docker 容器,还需要安装 docker-compose:sudo apt install docker- compose;验证安装成功:docker-compose version;如图所示:
|
|
|
|
|
|
|
|
|
|
|
|
|
|
|
|
|
|
#### 2.2安装 golang
|
|
|
|
|
|
区块链框架Hyperledger Fabric 目前支持Java、Go 等主流编程语言并提供了相应的SDK,但是支持最全面的还是 Golang,因此采用 Go 语言来进行开发是比较好的选择;
|
|
|
|
|
|
1. 安装 Golang: wget https://dl.google.com/go/go1.17.0.linux-amd64.tar.gz
|
|
|
2. .使用 tar 命令将压缩文件解压至指定路径/usr/local/下: tar -zxvf go1.17.0.linux-amd64.tar.gz -C /usr/local
|
|
|
3. 最后是设置环境变量 GOHOME 以及 GOROOT: sudo vim /etc/profile 添加如下(当前用户为 root 用户,$HOME=/root):
|
|
|
|
|
|
```bash
|
|
|
export GOPATH=$HOME/go
|
|
|
export GOROOT=/usr/local/go,
|
|
|
export PATH=$GOROOT/bin:
|
|
|
```
|
|
|
|
|
|
4. $PATH 激活环境变量: source /etc/profile
|
|
|
5. 验证安装成功,使用 go version 结果如图所示:
|
|
|
|
|
|

|
|
|
### 3.项目部署
|
|
|
|
|
|
1. 1.创建保存项目的文件夹: mkdir -p $GOPATH/src
|
|
|
2. 进入文件夹: cd $GOPATH/src
|
|
|
3. 从 github 仓库克隆项目: git clone https://github.com/bug-away-away/BlockChainCreditSystem.git
|
|
|
4. 进入项目目录:cd education
|
|
|
5. 添加项目开发需要依赖的 Golang 包:go mod tidy
|
|
|
命令可能会执行失败,此时设置代理即可:go env -w GOPROXY=https://goproxy.cn
|
|
|
|
|
|
|
|
|
### 4.启动项目
|
|
|
|
|
|
由于每次启动流程相对固定,因此编写脚本来自动清理 docker 然后启动项目在项目的目录下运行 clean_docker.sh 脚本即可启动项目:
|
|
|
|
|
|
```bash
|
|
|
./clean_docker.sh
|
|
|
```
|
|
|
|
|
|
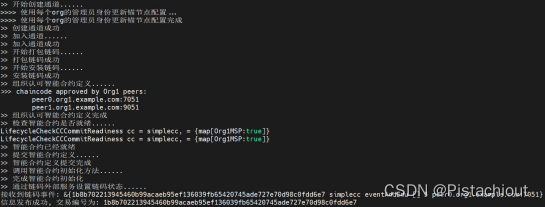
项目启动成功的结果如图所示:
|
|
|
|
|
|
|
|
|
|
|
|
|
|
|
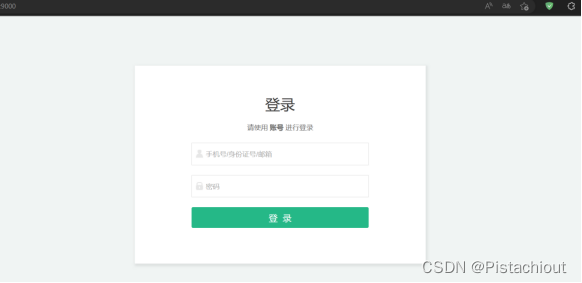
通过浏览器访问 9000 端口即可进入 web 端,结果如图所示:
|
|
|
|
|
|
|
|
|
|
|
|
|
|
|
: 
|